
Imagine having an AI assistant that could automatically analyze incoming emails, understand attached documents and suggest professional responses - all while maintaining the context of the conversation.
In this tutorial, we'll build exactly that: an email analysis system that automatically processes emails and their attachments using LLM. We'll combine DeepSeek V3's strong analysis capabilities with Upstash Workflow's reliable Agent framework to create a system that can help streamline your email commmunication workflow.
You can access the final version of the project here.
What are we building exactly?
Our system will:
- Orchestrate the whole process using Upstash Workflow Agents with reliable/durable execution in serverless environment
- Automatically process forwarded emails using Zapier as a webhook trigger
- Analyze email content and PDF attachments using DeepSeek V3
- Send the email response suggestions through Resend
Technical Architecture
Let's dive into how our system works under the hood. We're implementing a multi-agent architecture where each agent specializes in specific tasks. Each agent is attached with a necessary tool.
Getting Started
Step 1: Project Setup
First, let's set up our development environment and necessary packages
# Create a new Next.js project
npx create-next-app@latest email-analysis --typescript --tailwind --app

# Navigate to project directory
cd email-analysis

# Install required dependencies
npm install @upstash/workflow ai zod pdf-parse resend
Environment Setup
Create a .env file in your project root. We need QStash token for the workflow and agents.
DEEPSEEK_API_KEY=
QSTASH_TOKEN=
RESEND_API_KEY=- For
QSTASH_TOKEN, please navigate to Upstash Console. - For
RESEND_API_KEY, sign up on Resend and create yourself an API key. - For
DEEPSEEK_API_KEY, please sign up on DeepSeek and create an API key.
Step 2: Creating the Analysis Endpoint
We'll start by creating the overall layout of the project, which includes the necessary imports and creating the workflow endpoint.
Using the serve method is the fundamental logic of the Upstash Workflow library. We'll continue the implementation with creating the agents and their respective tasks, and wrapping them with the serve method will enable us to execute the agent tasks in a reliable manner.
2.1 Layout and Imports
The below snippet sets up our basic imports and types. The EmailPayload type defines the structure of data we expect from Zapier Webhook.
import { serve } from "@upstash/workflow/nextjs";
import { tool } from "ai";
import { z } from "zod";
import pdf from "pdf-parse";
import { Resend } from "resend";

// Define our payload type
type EmailPayload = {
  message: string;
  subject: string;
  to: string;
  attachment?: string;
  attachment_type?: string;
};

// Initialize Resend client
const resend = new Resend(process.env.RESEND_API_KEY);

// Workflow endpoint
export const { POST } = serve<EmailPayload>(async (context) => {
  const { message, subject, to, attachment } = context.requestPayload;
  const model = context.agents.openai("deepseek-chat",
    {
      baseURL: "https://api.deepseek.com",
      apiKey: process.env.DEEPSEEK_API_KEY
    }
  );

  // Agents definitions and tasks will come here
});
To use the pdf-parse library, we need to do a small update in the next.config.js file.
import type { NextConfig } from "next";

const nextConfig: NextConfig = {
  serverExternalPackages: ["pdf-parse"]
};

export default nextConfig;
2.2 PDF Processing Agent
The PDF Processing Agent is the workhorse behind our document analysis capabilities. Think of it as a specialized worker whose sole job is to parse, read and understand PDF documents. When we create this agent, we give it a clear mission through its background prompt - it knows it's a specialist in extracting and summarizing information from PDFs.
The heart of this agent is its processPDF tool. When given a PDF URL(File URL of the mail attachment), it springs into action: downloading the document, converting into a format it can read and extracting the text content.
The tool (function) calling is a native feature of OpenAI compatible LLMs, and it shapes the core of the Upstash Workflow Agent library. To learn more you can see the OpenAI Function Calling Docs or tools section in Upstash Workflow Agents docs.
Now, let's create our first agent in the serve method.
export const { POST } = serve<EmailPayload>(async (context) => {
  const { message, subject, to, attachment } = context.requestPayload;
  const model = context.agents.openai("deepseek-chat",
    {
      baseURL: "https://api.deepseek.com",
      apiKey: process.env.DEEPSEEK_API_KEY
    }
  );

  const pdfAgent = context.agents.agent({
    model,
    name: 'pdfAgent',
    maxSteps: 3,
    background: 'You are a specialist in extracting and summarizing key information from PDF documents.',
    tools: {
      processPDF: tool({
        description: 'Process and extract text from PDF attachments',
        parameters: z.object({
          attachmentUrl: z.string().describe('URL of the PDF attachment')
        }),
        execute: async ({ attachmentUrl }) => {
          if (!attachmentUrl || attachment_type !== "application/pdf") {
            return "NO_ATTACHMENT";
          }

          const response = await fetch(attachmentUrl);
          const fileContent = await response.arrayBuffer();
          const buffer = Buffer.from(fileContent);

          try {
            const data = await pdf(buffer);
            return { content: data.text };
          } catch (error) {
            console.error('Error parsing PDF:', error);
            return { content: 'Unable to extract PDF content' };
          }
        }
      })
    }
  });
});
2.3 Email Composition Agent
Now that we have our PDF processing available, let's create an agent that specializes in composing thoughtful email responses. This agent will be responsible for understanding context from both the original thread and any PDF content, then crafting both a summary of the email thread and an appropriate response suggestion.
This agent will also use Resend API to actually deliver the email response back to you. We've equipped it with a sendEmail tool that handles the email delivery process. The tool uses Zod for parameter validation, making sure that we always have the required information in runtime before attempting to send an email.
2.4 Orchestrating the Workflow
With both agents defined, we can now orchestrate the complete workflow, how these agents will share the tasks between them. This involves processing the PDF, and providing the context to emailAgent to generate the email response. To achieve this, we'll use the task API of Upstash Workflow Agents. We'll define a task for each of the agents and execute them.
This workflow orchestration si where Upstash Workflow really shines. The tasks are executed in a reliable, durable manner, meaning that even if there are temporary failures or timeouts-related to serverless function- the workflow will continue from where it left off. This is particularly important when dealing with tasks that could take time like LLM completion, or 3rd party API calls .You can also investigate the logs related to your workflow on Upstash Console.
Here's how we bring everything together:
export const { POST } = serve<EmailPayload>(async (context) => {
  const { message, subject, to, attachment } = context.requestPayload;
  const model = context.agents.openai("deepseek-chat",
    {
      baseURL: "https://api.deepseek.com",
      apiKey: process.env.DEEPSEEK_API_KEY
    }
  );


  // ... agent definitions ...

  // Step 1: Process PDF if it exists
  let pdfContent = '';
  if (attachment) {
    const { text } = await context.agents.task({
      agent: pdfAgent,
      prompt: `Process this PDF attachment using the processPDF tool.
              If the attachment doesn't exist or is not a PDF, tool returns NO_ATTACHMENT string.
              Attachment URL: ${attachment}

              Extract and summarize the key information from this PDF.
              Return the extracted content in a clear, organized format.`
    }).run();
    pdfContent = text;
  }

  // Step 2: Generate and send email response
  await context.agents.task({
    agent: emailAgent,
    prompt: `You are going to compose an email and send it using the sendEmail tool.

            Email Parameters:
            TO: ${to}
            SUBJECT: ${subject}
            MESSAGE CONTEXT: ${message}
            PDF CONTENT: ${pdfContent}

            First, compose your email response. Then, use the sendEmail tool with these exact parameters:
            {
                "to": "${to}",
                "subject": "Analysis: ${subject}",
                "content": "YOUR_EMAIL_CONTENT"
            }

            The response should be concise but address all key points from both the message and PDF content.`
  }).run();
});
2.5 Deployment
In order to work with Upstash Workflow, we need a publicly accesible endpoint. We can either use local development flow with ngrok, or deploy our project to Vercel.
We'll first start our local tunnel on port 3000 using ngrok. To learn more about local development, see related docs.
ngrok http 3000This will show you a publicly accesible endpoint. You can pass that to serve method as an option, as shown in the snippet
// Workflow endpoint
export const { POST } = serve<EmailPayload>(async (context) => {

  // Rest of the code from above
  // ...

}, {
  baseUrl: "https://1b3e-85-101-27-2.ngrok-free.app"
});
Make sure to save this endpoint somewhere, since we'll need it in the next step.
Step 3: Setting Up the Zapier Integration
We now have the backend logic in place, but we still need to set up the trigger that will activate our workflow when you forward the thread to the email address dedicated to analysis agent.
There are several products to achieve this, like AWS SES, Mailgun or Zapier etc. For this guide we'll be using Zapier, since it has the easiest setup between these. But you can always use an integration of your liking.
We'll use Zapier to monitor an email inbox and forward relevant emails to our analysis endpoint.
3.1 Creating the Zap
First, log into your Zapier account and create a new Zap. We'd recommend using this starting template that we've created for you.
3.2 Email Integration
We need an email address dedicated to the email analysis agent. This is kind of important, since we don't want to be spammed by our agent. In the first step of the Zap, connect the Gmail account of the agent. You can also use other integrations provided by Zapier for this step.
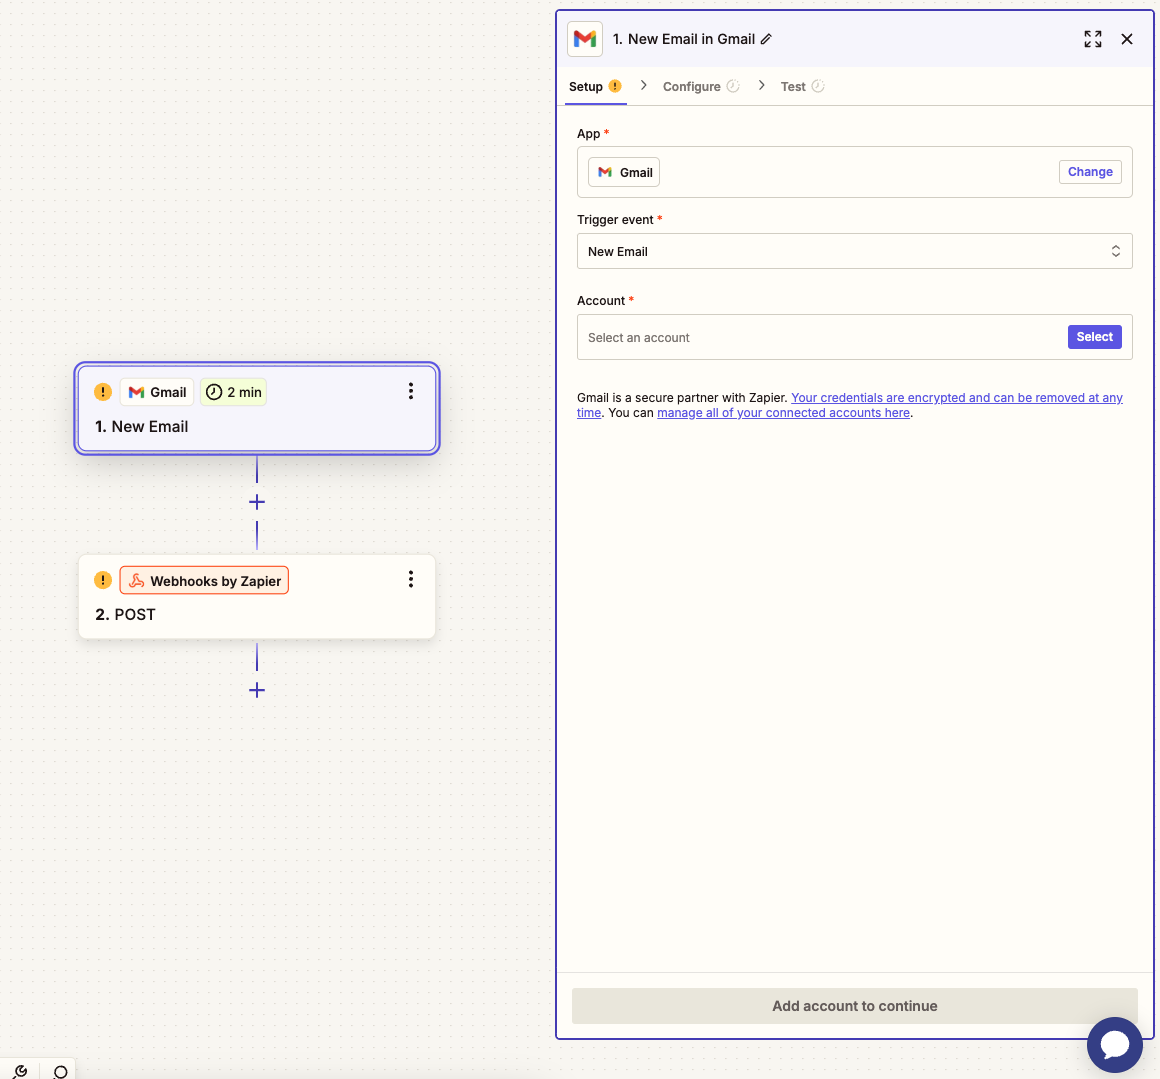
In the configuration section, select an example thread you'd normally would like to get analysis of. This will show you how emails are parsed in a Zap.
3.3 Configuring Webhook Action
In the Zap's action step, we'll have a Webhooks by Zapier step, which sends an POST request to our backend when it detects a new email in the inbox.
For the URL field in the Configure section, make sure to use the local tunnel URL from the deployment section in the previous step.
The data field will be sent to the backend in the webhook event. Make sure to create the fields shown in the image.
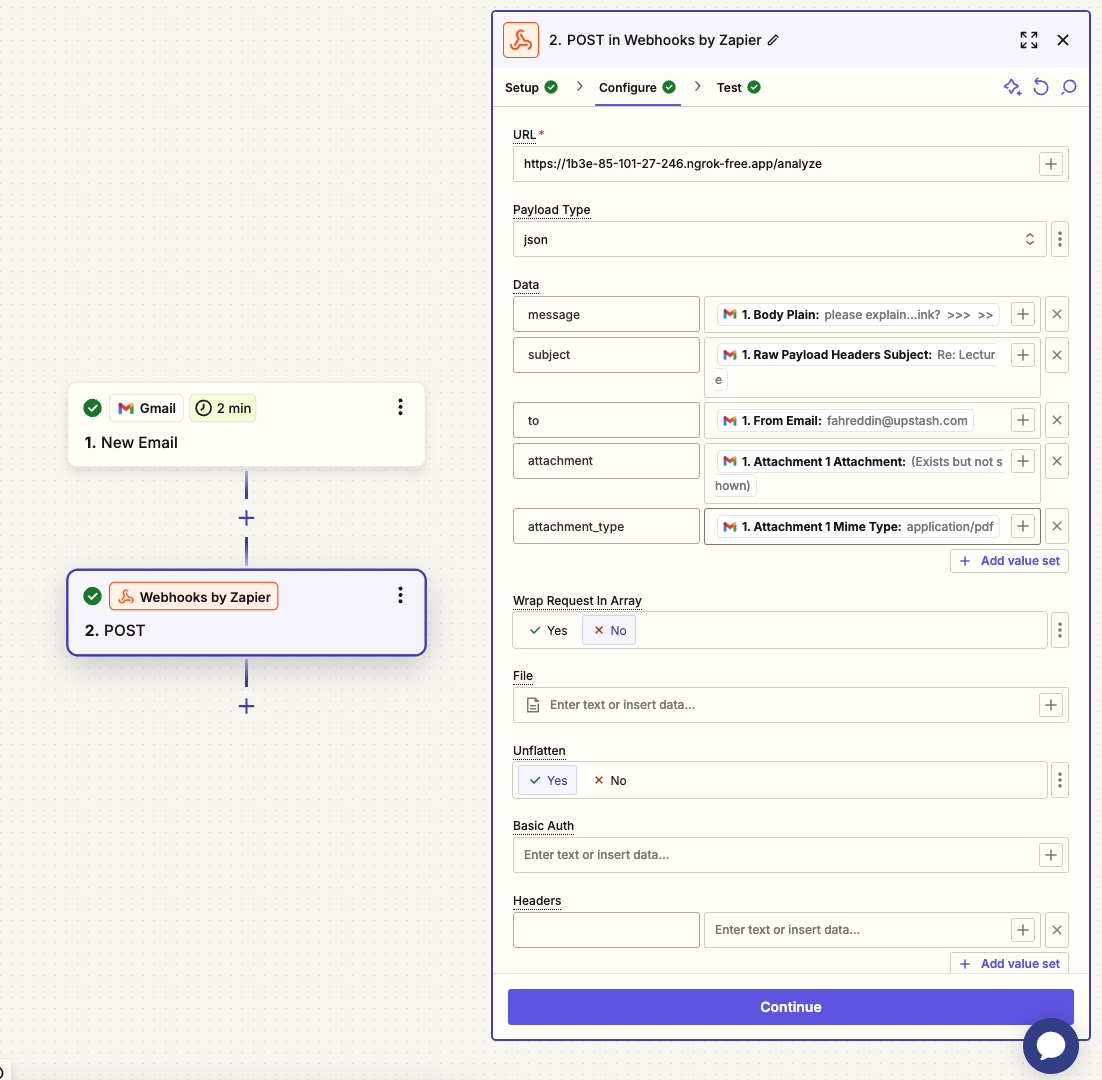
In the Test step, you can test the backend using the specific email you've selected in the previous step, as if that email was just sent to the inbox.
3.4 Publish the Zap
Using the Publish button on top right, release a version for your Zap. Then, we are ready to go!
Testing the System
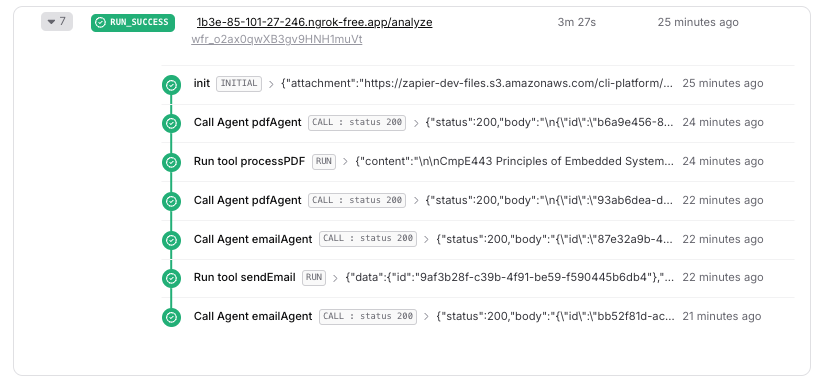
Now that we have everything set up, we can test the system by forwarding an email to the dedicated email address. The system will automatically process the email and its attachments, and send a professional email response suggestion back to you.
After the email is processed, you can check the logs on the Upstash Console to see the execution
Next Steps and Possible Improvements
After implementing the basic system, there are some ways you could improve the system.
- Using AWS SES to receive and process incoming emails, which will allow/require you to use your own domain and store the attachments/email contents in an object storage like S3.
- This project now supports single image or pdf attachments, but you can customize it to support more.